Email Signature Creator Instructions

How To Use This Great GPS Tool Effectively.

What's An Email Signature?

It’s a personalized block of text and images automatically appended at the bottom of an email message like the example shown above.

You can even include a compelling phrase and button to invite your recipients to learn more about your company.


Once you create and submit your Email signature as per the instruction you find below, it will be automatically added to every email you send out from your GPS Internal Mailing System.

But, even more important, you can easily set up your habitual email client to include your signature in every email that you send out!

It’s a great, easy, and effective way to proudly show all your recipients that you’re part of a great company.

They can be curious to know more about it and, why not, signup as Shoppers, or Affiliate Members of your team, depending on your landing page URL that you want to include in your signature.

We advise you to use it to invite your recipients to enjoy the increased buying power they instantly get by subscribing FOR FREE as Clubshop Shopper Members.

How to prepare your signature file.

1st tab

Start by opening the first tab in the editor to select the template you want to use for your email signature.

You can also swap from one template to another once your signature is complete to see how it looks with all the details.

2nd tab

Open the second tab to enter your email signature details, such as your name, email address, phone number, social media username, etc.

By default, these fields are pre-filled with the contact details you entered in your Clubshop profile.

You can edit or add what is missing.

You can decide to leave blank some of the fields you don’t want to include in your signature.

3rd tab

Open the third tab to stylize your signature.

Here you can select the colors you prefer, but we advise preserving the Clubshop brand identity.

4th tab

In the fourth tab, you find the fields pre-filled with the URL of the photo you previously uploaded to your Clubshop profile and the URL of the company’s logo.

You should also include a CTA (Call To Action) to invite your recipients to enjoy the benefit you want to share with them, with the link of the Landing Page you want them to see when they click on the CTA button.

Once you’re done editing your signature, click the Submit button to confirm your signature and start using it as per the instructions below.

How to get your signature into your email client.

Once you’ve submitted your email signature, use the “Copy” button to copy the signature or the source code.

Depending on your email client, there will be different steps for uploading your email signature. Please, find below additional instructions for adding your email signature to Gmail, Outlook, Apple Mail, and Yahoo Mail.

Note: you don’t need to do anything to add your signature to all the messages you send out through your GPS Mailing System, as it’s automatically set up for you when you click the button “submit,”  as just explained above.

Gmail

  1. Log in to your Gmail account, then click the cog in the top right corner.
  2. Select Settings from the drop down menu.
  3. Scroll down until you reach the email signature editor, then paste your new email signature there.
  4. Scroll to the bottom of the page and click ‘save changes.

Outlook

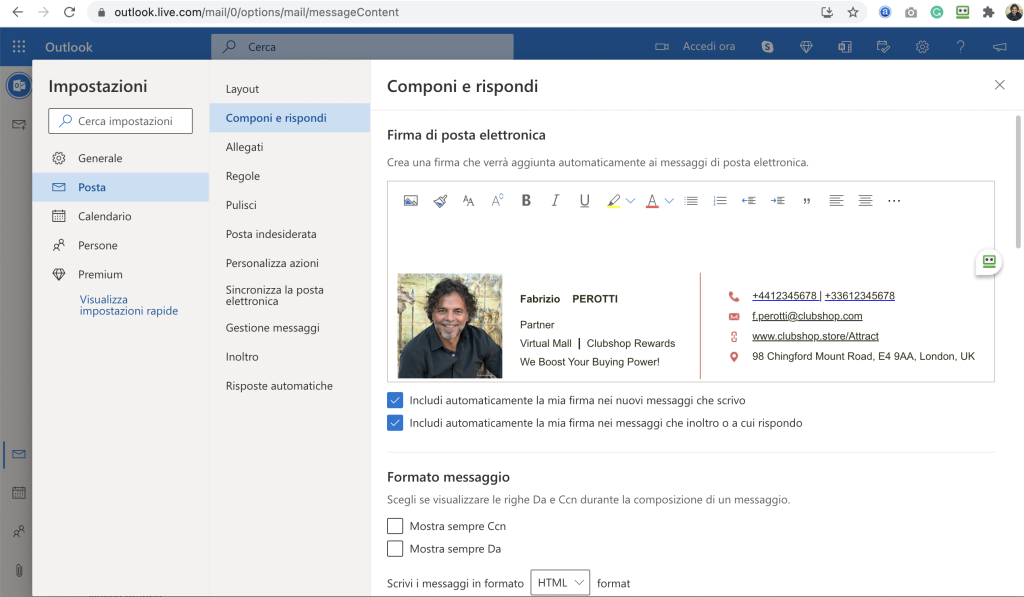
  1. Sign in to Outlook.com and select SettingsSettingsView all Outlook settings at the top of the page.

  2. Select Mail >Compose and reply.

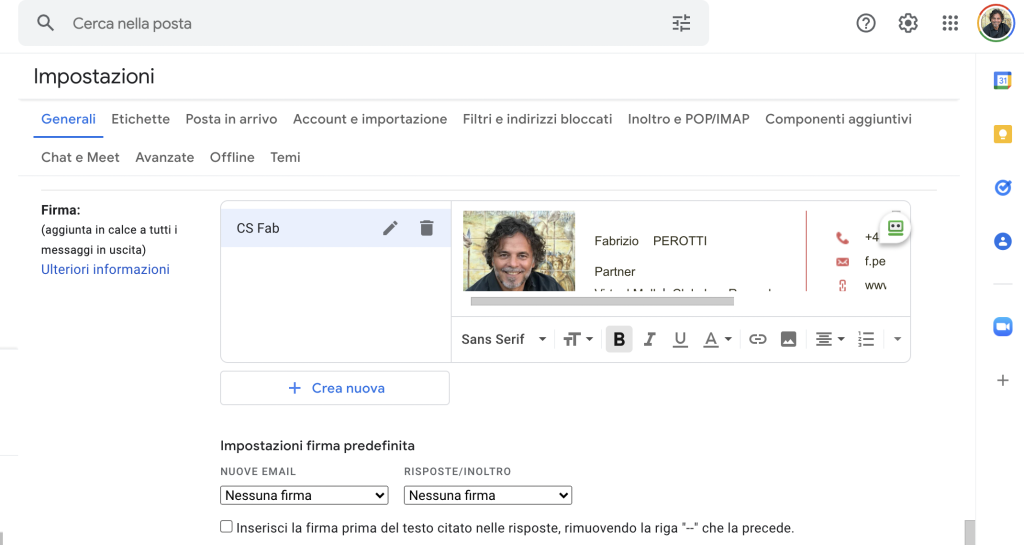
  3. Under Email signature, paste your new signature.

    • If you want your signature to appear at the bottom of all new email messages that you compose, select the Automatically include my signature on new messages I compose check box.

    • If you want your signature to appear on messages that you forward or reply to, select the Automatically include my signature on messages I forward or reply to check box.

    • If you don’t select these options, you can manually add your signature to a selected message. For details, see Manually add your signature to a new message.

  4. Select Save when you’re done.

Apple Mail

  1. Open the Mail application.
  2. Click Mail and then Preferences in the top left corner of your screen.
  3. From the preferences pop-up, click the Signatures tab.
  4. Click on the email account where you want to add the new signature.
  5. Click the + button at the bottom of the middle column.
  6. Paste your new email signature into the right-hand column and make sure to uncheck the checkbox that states, “always match my default message font.”
  7. Close the pop-up window to save.
NOTE: don’t worry if for some reason you don’t see the signature correctly displayed in the editor. You can get out if it, compose a new and test the signature. It should be correctly set.

Yahoo Mail

  1. Log in to your Yahoo Mail account and select Settings > More Settings.
  2. On the left side of the screen, select “Writing email” and then locate the Signature header.
  3. If you have multiple Yahoo Mail accounts, use the toggle to toggle on the account you want to customize your email signature for.
  4. Paste your new email signature into the text box to save it.